Showing posts with label Glitterpot. Show all posts

Saturday, 24 March 2012

Some Demo Day cards

Hello bloggers,


today is such a beautiful day, I am going to go out soon to enjoy some of that sunshine! But not before I share some (hmm, a lot really) cards with you, that I made for the Demo Day in the Glitterpot on the 3rd of March.
I was demoing Copic Markers again, which means all colouring on these cards are with Copics. I won't go into any details as there are so many and as always, you can ask any questions you might have in the comments section or send me an email. I'll do my best then to answer every question you have!


I got to work with the sweet new Bella range from Wild Rose Studio and the new designs from Imagination Crafts and to showcase a Copic Background technique I used Floral Sketches set by Hobby Art. If you want to see more detail, you can always click on the pictures to enlarge them.


Bella first:


Isn't she the cutest? And let me tell you, she is much easier/quicker to colour than those balloons! God, they  take a long time to get right!


On to the Imagination Crafts:


Sorry for the poor pictures on some of these, I never seem to have enough time to take them properly...

And last but not least, the backgrounds... the blue green one is my favourite!


Hope you like my offering today, I am off into the garden now! Have a good weekend!

Monday, 20 February 2012

Copic Class at the Glitterpot

Good afternoon everyone!


On Friday I had a lovely day at the Glitterpot teaching a workshop on using Copics on "Girl" stamps. It was a great assortment of wonderful ladies and I believe I had three sets of mothers with daughters in it!


I had chosen to work with a Gorjuss Girl stamp and one of Mo Manning stamps that Penny Black have brought out recently, love her stuff! 
So here are the cards I created for the workshop, as usual when I teach colouring I kept the layout simple.


Paper is Basic Grey "Kissing Booth - I do"and I used the following Copics:
R89, 85, 83, 81 (pinks)
E21, 00, 000, R02, 05 (skin)
E15, 13, Y21 (hair)
E74, 71, 70 (ground)
Y23, 17 (yellow on flowers)
N3,1,0 (greys/shadows)
G28, 24, 21(greenery)
and the blender as always...
Here is a detailed look:


Next I made another card with her, slightly altering the colours and giving her red hair instead of blonde.


Paper is by My Mind's Eye "Miss Caroline "Howdy Doody Baby Chantilly" and I used these Copics:
E19, 07, 15, 13 YR07, Y21(hair)
Skin as before
Y23, 21 and a colour I mixed myself from 2/3 colourless blender and 1/3 Y21 (socks and yellow on dress and flowers)
W5, 3, 1 (ground)
N3, 1, 0 (grey/shadows)
YG17, 13, 11 (greenery)
R85, 83, 81 (heart pendant)
B000 (background)


For this next card I wanted a vintage-y feel but tried to liven it up a bit with the fresh turquoise green of the backing paper, which is MME Miss Caroline "Howdy Doody Like Wild Flower".


I used the following Copic colours:
E59, 57, 55, 53, 51, 50 (hair, horse body)
skin colours as before
E49, 47, 44, 43, 41 (horse mane, rocker, shoes)
E81, 43, 41 (dress)
Y23, 21 (shirt, hem, arm warmers and tights)
E19, 15, 13 (saddle and reigns)
N3, 1, 0 (grey/shadows)
W5, 1, Y21, E15 (background)


Last but not least another pink one...


Paper is Basic Grey "Kissing Booth - lip lock" and I used these Copics on her:
C9, 7, 5, 3, 1 (hair, shoes, mane, ground)
skin as before
R89, 85, 83, 81 (dress, leg and arm warmers)
N3, 1, 0 (horse body, shirt, hem and shadows/grey)
E47, 44, 43, 41 (rocker, saddle, reigns)
B000 (background)

And here a last detail look


Hope you like them!

Friday, 10 February 2012

It's a man's world...

Hello there,

just want to share some cards for the boys that were done for a Glitterpot class recently... 
I used a Butterfly Kisses stamp set called "Old Crock" which has some lovely images in for lots of applications. Also used the Memory Box ticket die and the coordinating stamp.

First off though I used the stamp set together with Spellbinders Nesties Stars and some grey and blue patterned paper and cardstock. Fairly simple design with some faux stitching and distressing of edges.


The next one is a large A5 card in browns, again with lots of distressing and faux stitching going on.


And lastly another card using more or less the same ingredients with some blue, twill ribbon, twine and a button thrown in. 


Hope you like them!

Thursday, 9 February 2012

More Glitterpot class cards

Hello again!
I did mean it, when I said I'll be here more often now! *lol* It might not be every day but as often as I can.
As I said on my last post, I still have some cards left to share that I did recently and today it's some more Glitterpot class cards.


This first card uses the Large Flower Background stamp from Hero Arts, which I absolutely love. I coloured it with Copics ( YG61, BG01, BG000, R81, R83, Blender 0) and cut out the middle part with Labels Four from Spellbinders. For the mat layer I cut scalloped borders from pink Bazzil card, put my image panel on top and put the label die in the aperture again. Then I traced the inside of the die onto the pink card and cut that out by hand to get that small border all around.
The large flower to the right was trimmed out from a second print of the stamp, again coloured with Copics (R81, R83, R85, YG61, YG63, YG67, Blender 0) and adhered with silicon glue for a bit of depth. Sentiment is from a Personal Impressions set called Big Sentiments, designed by Paula Pascual and stamped in Versafine Smokey Gray.


Here is a detail view where you can see the dimension of the flower a bit better:


The cut-outs from the above card seemed a shame to throw away, so I added a bit of doodling, ribbon and a sentiment (Hero Arts - Say it all) and made this:


As I said, I love this stamp so couldn't quite leave it alone. For the next card I stamped on watercolour paper and coloured with distress inks. Colours used are: Wild Honey, Mustard Seed, Forrest Moss and Broken China. I matted onto sunshine yellow card and added a turquoise butterfly and banner with heat embossed white sentiment (PI - Big Sentiments).


I played around with watercolour paper and Distress Inks with this stamp some more but not made them into cards yet, this one is stamped in Versamark and heat embossed in white before colouring.


And this one is heat embossed as the above, then sprayed with water and coloured with my fingers dipped into ink. This gives a very soft look.


For the next cards I used a Hero Arts set called "Greetings" and stamped the butterfly collage in Vintage Sepia and again in Onyx Black, trimming the butterfly out of the black after colouring it in pencil.
I distressed the brown with DI in Gathered Twigs and did the same to the Echo Park paper. The image was matted onto turquoise card and set at an angle over dark brown card, sandwiching some white twill ribbon I coloured with Copics to match the butterfly.


Here you can see the butterfly is glued only at the body part and the wings are lifting off the card.


For my last card for now I used the typewriter collage stamp from the set in a similar way, stamping in mauve and grey before cutting and reassembling with a bit of silicon glue. Some pink card and more Echo Park paper and ribbon to finish.


That's it for today, hope you like my projects and thanks for stopping by. If you leave me a comment I'll try my best to return the favour and visit your blog as well!

Wednesday, 8 February 2012

Ribbon and Twine Workshop

Hello bloggers!
I have been working in my little studio and then remembered that I still have quite a few things I hadn't shared yet. So here I am now with some cards I made for the ribbon and twine workshop I held at the Glitterpot recently. It was a fun class and I think we made some lovely cards. But judge for yourself:


A card with apertures that I "filled with ribbon and twine, great for scraps! This one turned out quite "manly" I think...


These flowers were made with extra wide ribbon that I folded in half lengthwise and snipped at the top before rolling them up.


This one has a few things going on, weaving through a border punch design, folding onto DST and a punched out shape covered with twine.


And my favourite, the flower bouquet with lots of different ribbon flowers.


Here is a detailed picture of the flower bouquet card:


I particularly like the ricrac rose, but the organza flowers are lovely, too.


Hope you like these projects, thanks for stopping by!

Monday, 30 January 2012

Samples from last Glitterpot Class

While I was here at my blog to give you the colours for the previous card, I thought I might as well share a few more cards...
I had the pleasure of teaching a class on "Blooming Copics" recently and I haven't shared the pics with you yet. I had a wonderful day with some equally lovely people and I think they enjoyed the day as much as I did.
I went a bit overboard again with my samples (as in, making too many...) but that's me, hard to stop me when I started ;-)


This first one uses the Penny Black image "Pin-striped" and I used YR07,YR04, Y38, Y19, Y17, Y15, Y11 and Y00 as well as the blender pen on the petals. The stamen were done in Y17. Leaves and stems were coloured in YG67, YG63 and YG61 (plus blender).
I gave the hint of a shadow with T2 on the right-hand side of the flowers.
The sentiment is from a Hero Arts set called "Say it all". 
I matted my image on red card and punched two slits to thread the ribbon through. The bottom part of the background is green cardstock that was embossed with the CB script folder, the paper on the top part is by Echo Park and called Victoria Gardens - Botanical Ballad. It's a lovely double-sided paper with music score on the other side that I used on some of the other cards as well.


For this card I stamped "Cheerful" by Penny Black and coloured with V17, V15, V12 (petals), Y19, Y11 (center), YG63, YG61(leaves and stem) and the blender. I then cut out the flower and pop it up with silicon glue onto the aforementioned Echo Park paper that I swiped with a bit of Tea Dye distress ink. 
I cut a frame from green cardstock that I embossed with a pretty damask CB folder swiped with white ink and added some spotty lilac ribbon before adhering with foam pads. 
Sentiment from Hero Arts again.


Now on to some poppies cards... The images are from the Hero Arts set called "Delicate Blossoms" and for this yellow version I used Y17, Y15, Y11, Y00 and the blender for petals, G28, G24 and G21 for stems/leaves and RV000 for the background. Matting in yellow and a die cut Marianne design branch from the same card. Sentiment from Hero Arts again, stamped in pink rather than black this time.
Backing paper (sorry, forgot the make!) was cut with the Nesting Doorplate die by X-cut. 


This time I coloured my poppies in blue with B28, B26, B24, B21 and blender, stems in G29, G28, G24 and G21 and the background was dotted in C4, B24 and G24, I used C1 to blend. Green card matt, paper and sentiment as before and some ribbon loops to complement the paper.


Now some red big poppies! I used R89, R37, R35, R32 and R30 for the petals, G28, G24 and G21 for stems and B000 for background and added a bit of faux stitching to the panel before adding it to the red card panel. I heat embossed the Tim Holtz sentiment with white embossing powder and added a couple of pieces of ribbon before glueing everything to the card blank.


For this (last!) one I decoupaged the two largest flower heads but it's hard to see in the picture. You can always click on any picture to see a larger version!
The petals are coloured with R85, R83, R81 and blender, stems are YG65, YG63 and YG61 and background is Y21. Y21 is called buttercup yellow and I love this colour! I matted this panel on pink card and mounted with foam pads after first stamping the narrower image in pink ink in different heights from the top left and bottom right. The sentiment is a Tim Holtz one again.

Hope you like my cards, feel free to leave me a comment!

Monday, 5 December 2011

At long last

Hello there,


I am sorry that I have been absent again for so long. Despite my best intentions I never seem to get round to do the blogging.
Last Saturday was my last class at the Glitterpot for this year (although if you want to attend one of my classes, the January and February ones are up on the website now and you can book now, some are already filling fast!) and I really enjoyed the day with some lovely ladies! I went a bit mad on the sample front but decided to just go with it and prepare the packs so everyone could do any (although not all) card out of the bits provided. It was quite interesting to see which ones people chose to do!
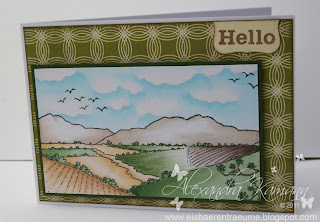
The class was a colouring with Copics one with a focus on nature and landscape. So without further palaver, here are my samples. For the "landscape" part of the session I made these cards:


For these ones I used a couple of Hobbyart sets (Scene it toppers and Flypast) and Echo Park paper "Sweet Stripes" as well as Personal Impressions Sentiment stamps.
Other materials used:  White and coloured/textured cardstock, Vellum, buttons from stash( I think they are Basic Grey) a Spellbinders Label die and of course Copics! I stamped onto Craftwork Cards Premium Digital Paper with Memento ink, Sentiments stamped in Versafine in black and sepia and I distressed the edges of the paper and labels with Walnut Stain Distress Ink.


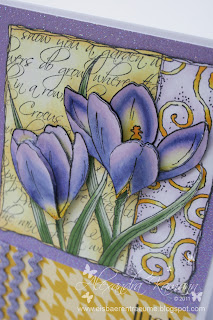
For the "nature" part I used a lovely crocus stamp set by Imagination Crafts.


As you can see, I went a bit overboard, just couldn't stop using these *lol*
Apart from the stamp set which includes the sentiments and single crocus image as well as the large tile image I used white and coloured, glittered and textured cardstock, Echo Park "Yellow Damask" paper, some ribbon & ricrac, vellum, clear gemstones and again ink, paper and Copic pens as above. The decorative edge on the first card was achieved by using a label punch repeatedly on the edge of the paper to create the border.


That's it for now, hope you like my cards and thanks if you decide to leave a comment!